
Inspiration | Alexander McQueen + Damien Hirst Scarf Collection


I have always been one who wants to find out the key to why things do what they do. Ever since I was a child, I was drawn to the cranks, bells, & whistles of why things shift, move & change. I feel blessed to have this kind of curiosity and I have worked to keep it alive. as a maker of things, it sooo important to understand the nature of your material choices. Why did I pick this over this? Why did that fiber react that way? What happens when I burn/dye/paint-on/tear/melt/use mordents/wet my chosen medium? This concept brings me to my point… By having test samples, I can better determine if I am truly using the best materials to describe my concept.


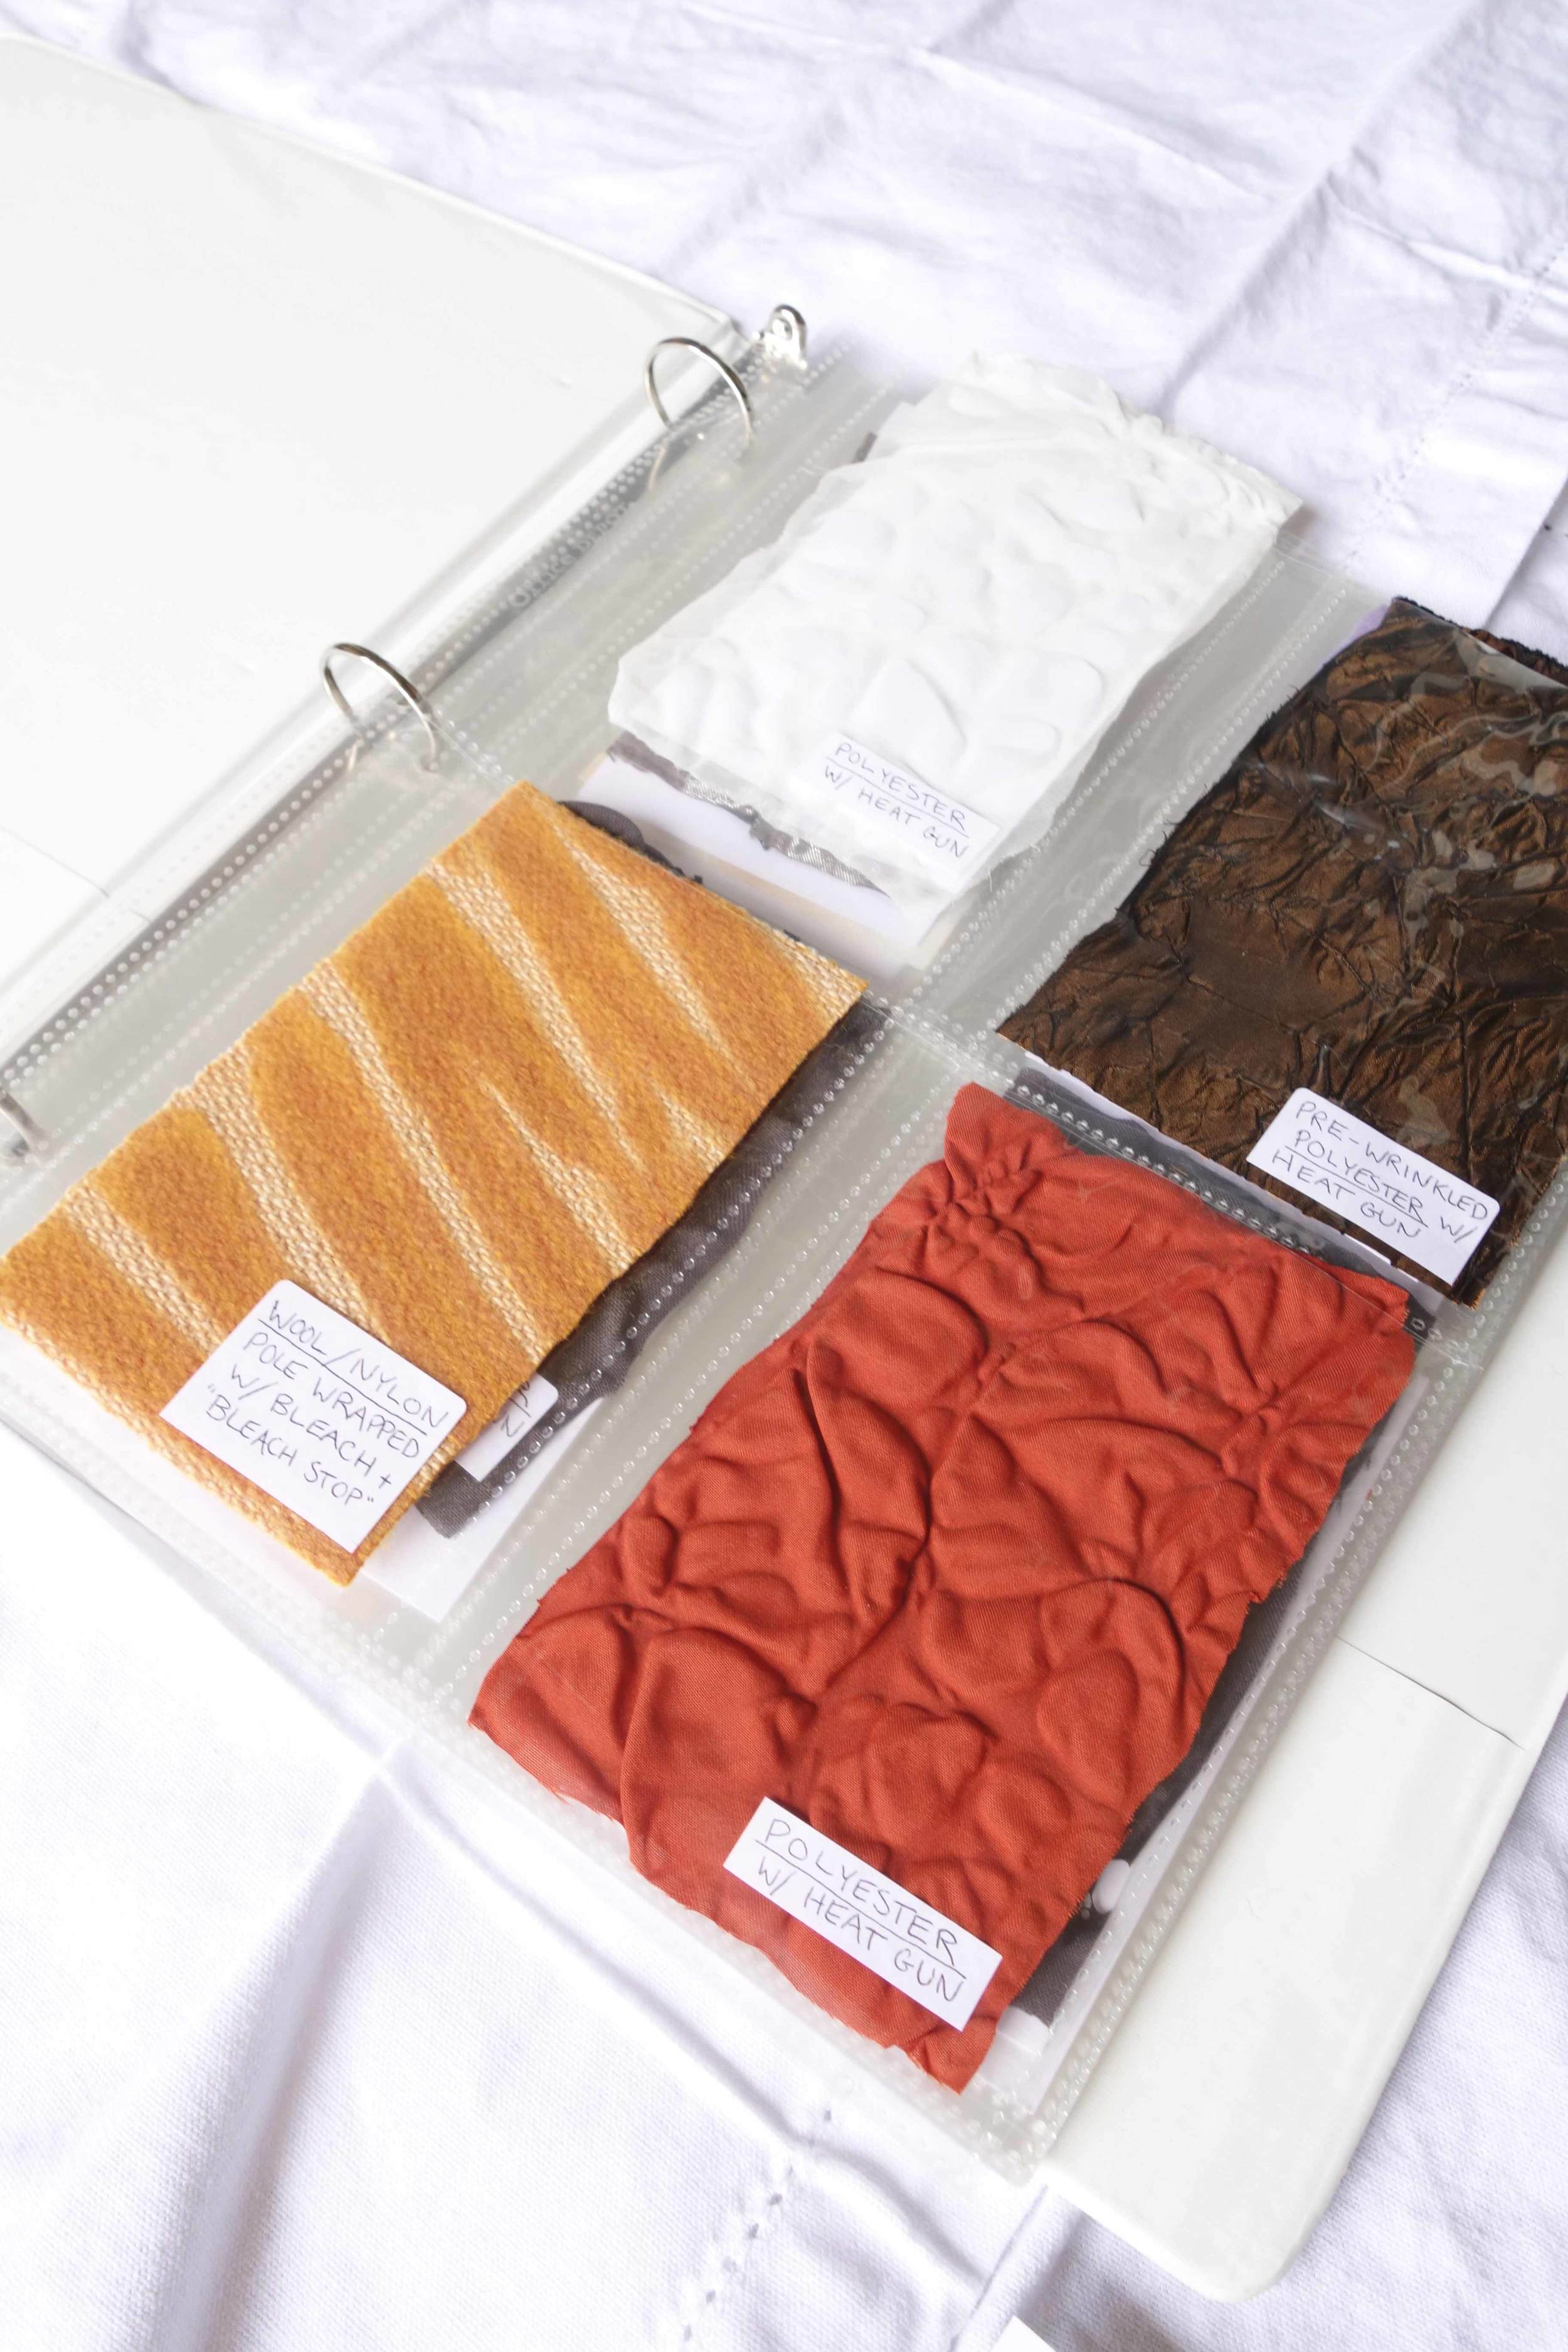
Use clear sleeves to keep hair/water/dust off of the fiber samples.

Back the samples in the sleeves with an index card. This will keep to focus on the page in front of you instead of of the previous or future page.

Here is one of my dye sample books. I like to keep several in order to keep things easy to find. (The samples shown in this post are from my topographical binder which was from a Richard Elliot course at California College of the Arts.)
It helps to see the color best in a neutral white space and not have any surrounding colors manipulating the light… which is why I prefer my clinical-looking, white binder. In keeping with this theme of the focus on the dye samples, it's best to use clear sleeves to keep hair/water/dust off of the fiber samples. Another idea for you to try is to back samples in the sleeves with an index card. This will keep to focus on the page in front of you instead of of the previous or future page.
Tips to Try: buy a yard each of your favorite fabrics in white. Cut them into strips and keep them in separate labeled bags. Each time you dye/melt/sew/etc. something, do the same to one strip of each fabrics. If they are excepted to change over time (such as a natural dyed sample) label them with the date too.


In the last several years, there has been a resurgence within the naturally based dyes, especially Madder root. Madder (Rubia tinctorum) also known as, Dyer’s madder + rose madder, this perennial plant has been used throughout history. Madder creates tomato red shades. It is an heirloom dye plant and has been discovered at ancient Egyptian tombs and the Lost City of Mohenjo Daro.
TOOLS: large Aluminum Pot + synthrapol detergent or biodegradable dish soap + gloves + stainless steel spoon + measuring cup + stove top or portable electric burner + a well-ventilated space


¼ gallons of water
½ cream of tarter
3 tbsps of ground madder root


First, wash & dry garment to avoid any chemicals on the fibers that will resist the dye. Then, add the cream of tarter and madder root to the aluminum pot. (Preferably, you will want your pot to be wider than the garment in which you dyeing.) Add the water and stir until all of the powdered contents are fully mixed into the water.
Turn on the heat up to a boil (140-160 degree heat). Once the pot has been at a boil for a few minutes, you can turn it down to a medium/low heat. Then you can dip the garment into the dye bath as straight and even ally as possible. This will ensure the garment will look like it was evenly dipped on front and back when worn. Remember to consider the kind of stove you are using. If it has an open flame, I strongly suggest hanging the garment on something. If it is electric, consider set your undipped side onto something. Either way keep it away from burning. You don't need to set anything on fire right?
(In this demo, I decided to turn off my burner and rest my garment along the edge of the pot to dye the center of the garment more. I have discovered the end result to be more figure-flattering + visually dynamic. I only do this if I am using my trusty, small electric burner because I tons of control over its heat.)
Allow the garment to be dipped in the dye for a couple of minutes, then raise it up and stir the dye a bit and dip it again. With each session, the dip will be more saturated with dye which in return will produce a richer color. Let it sit in the dye in between "raisings," gently stirring the dye bath so as not to disturb the garment too much, but so that the dye doesn't "settle" and cause uneven lines in the folds of submerged fabric.
Rinse dipped part first in luke warm water with biodegradable dish soap or Synthrapol until water runs clear of dye color.
Hang dry.

